

Replacing siding and windows together gives the installer direct access to the wall sheathing, water-resistive barrier, window openings, and exterior trim. This allows sill, jamb, and head flashing to be integrated with the housewrap in shingle fashion so water drains outward instead of entering the wall. A combined project can also prevent duplicated trim removal, improve air sealing, and create a more coordinated exterior design. No wall system is completely leak-proof, but proper flashing continuity significantly reduces the risk of hidden moisture damage.
Aging windows and worn siding often develop problems at the same time. Drafts appear around the frames, exterior trim begins to rot, siding fades, and water stains may form beneath window corners.
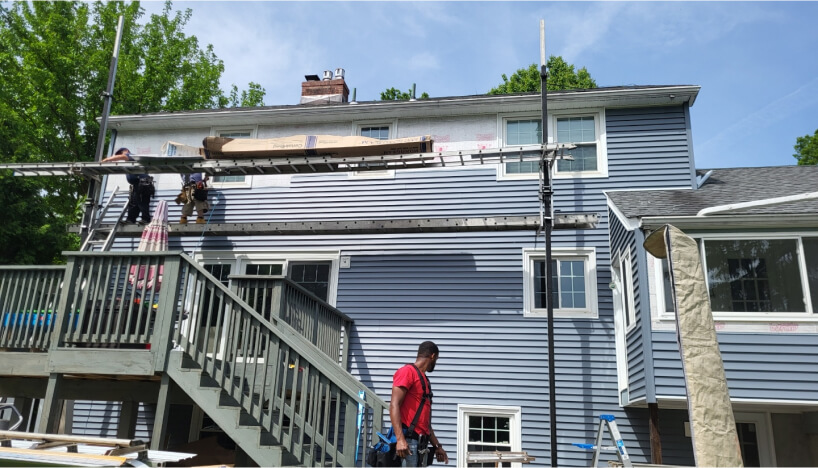
At Nor’East Exteriors Roofing & Siding, we evaluate the wall as a complete exterior system. When both components are near the end of their useful lives, completing the window installation and siding replacement together can provide better access, cleaner detailing, and a more cohesive finished exterior.
1. Create Continuous Flashing Around Every Window
A window is one of the most vulnerable openings in an exterior wall. Rain running down the siding must be directed around the opening and back onto the drainage plane.
Best-practice window installation includes:
- Sill or pan flashing beneath the unit
- Jamb flashing along both sides
- Head flashing above the window
- Housewrap layered over the head flashing
- Air sealing between the frame and rough opening
Federal building-science guidance states that head, jamb, and sill flashing should be integrated with the water-resistive barrier. The materials should overlap in shingle fashion so upper layers drain onto lower layers.
When siding has already been removed, we can inspect and rebuild these transitions without trying to work behind narrow sections of existing cladding.
2. Inspect the Sheathing Before Covering It Again
Removing old siding exposes conditions that are normally hidden, including deteriorated housewrap, stained sheathing, insect damage, rot, and failed flashing around window openings.
Building America guidance recommends inspecting the water-resistive barrier, flashing, wall penetrations, and sheathing for moisture damage when exterior cladding is removed. Any moisture source should be corrected before the new wall covering is installed.
Installing windows and siding separately may leave concealed damage untouched. A combined project gives our crew a clearer view of the rough openings and surrounding wall assembly before new materials cover them.
3. Avoid Paying for Trim Work Twice
Replacing a window after new siding has already been completed may require removing or modifying:
- Exterior window trim
- J-channel
- Siding panels
- Aluminum capping
- Flashing tape
- Interior casing
That work may then need to be rebuilt around the replacement unit.
By replacing siding and windows together, we can sequence the project more efficiently. The windows are installed and flashed first, followed by the trim, capping, and siding. This can reduce duplicated setup and help avoid unnecessary disturbance to recently installed materials.
Actual savings vary by home, access, window style, siding type, and underlying repairs.
4. Understand the Difference Between Capping and Flashing
Homeowners researching window capping and flashing in CT should understand that these materials serve different purposes.
Aluminum capping creates a neat, low-maintenance exterior finish over wood trim. It helps shed surface water and can coordinate with the siding, soffit, fascia, and gutters.
Flashing is the concealed water-management system behind the finished trim. Capping should never be treated as a substitute for sill pans, flashing tape, head flashing, housewrap integration, or proper drainage.
Flashing at exterior openings must extend to the wall finish or water-resistive barrier and be installed to direct water away from the framing.
5. Improve Energy Efficiency as a Complete System
A high-performance window cannot correct air leakage through gaps around its frame or through an improperly sealed wall.
ENERGY STAR evaluates windows using ratings such as U-factor and Solar Heat Gain Coefficient. Products must meet requirements based on climate zone, making climate-appropriate selection important for Connecticut homes.
Combining energy-efficient replacement windows in Westbrook with properly installed siding may allow us to address several performance areas at once:
- Drafts around window openings
- Missing or damaged housewrap
- Gaps around exterior penetrations
- Uninsulated wall areas
- Thermal bridging around trim
- Failed exterior sealants
Our Westbrook window replacement services provides complete replacement, new-construction installation, metal trim, PVC trim, and related exterior work. We provide both window and siding services throughout Westbrook and surrounding shoreline communities.
6. Coordinate Coastal Window Protection
Homeowners searching for coastal impact windows in CT should select products based on the property’s actual wind exposure, local code requirements, design pressures, and building location.
Impact-resistant glazing is designed to help protect openings against windborne debris. FEMA notes that coastal opening protection may involve impact-resistant glazing or approved protective systems.
Not every Connecticut window replacement requires impact glazing. We review the property, local requirements, window specifications, fastening details, and manufacturer instructions before recommending a product.
7. Create a Cohesive Exterior Makeover
Windows and siding have a major visual relationship. Completing both projects together allows us to coordinate:
- Window-frame colors
- Aluminum capping
- Siding profiles
- Corner posts
- Soffit and fascia
- Exterior doors
- Gutters and downspouts
- PVC or composite trim
Dark windows may provide contrast against light siding, while matching capping and trim can produce a cleaner traditional appearance. Our siding services include complete replacement, metal trim, PVC trim, soffits, inspections, and repairs using materials suited to Connecticut’s coastal conditions.
What Affects Window Replacement Cost?
Window replacement cost depends on the number and size of the units, frame material, glass package, installation method, trim details, accessibility, structural repairs, and whether impact-rated products are selected.
Replacing siding and windows as one project may reduce duplicated labor, but the best decision depends on the condition of each component. Windows that remain structurally sound may not need immediate replacement simply because new siding is being installed.
We provide a complete exterior assessment before recommending a combined or phased plan.
Plan One Exterior System, Not Two Separate Projects
Windows, flashing, housewrap, trim, and siding must work together to manage wind, rain, air leakage, and seasonal temperature changes.
Nor’East Exteriors Roofing & Siding provides coordinated window installation and siding services from Westbrook for homes across the Connecticut shoreline. Contact our team to compare project options and receive a clear estimate based on the home’s actual condition.
Frequently Asked Questions
Should windows be installed before new siding?
In most combined projects, the windows are installed and flashed before the siding and finished trim. This sequence allows the flashing to connect correctly with the water-resistive barrier.
Will replacing windows and siding together lower the total cost?
It may reduce duplicated trim removal, setup, and finishing work. Final savings depend on the project scope, materials, access, and required wall repairs.
Can aluminum window capping stop a leak?
Capping can help shed surface water, but it cannot repair missing sill flashing, damaged sheathing, failed housewrap, or an incorrectly installed window.